XAU/USD Support/Resistance That Works: Mapping Liquidity Zones
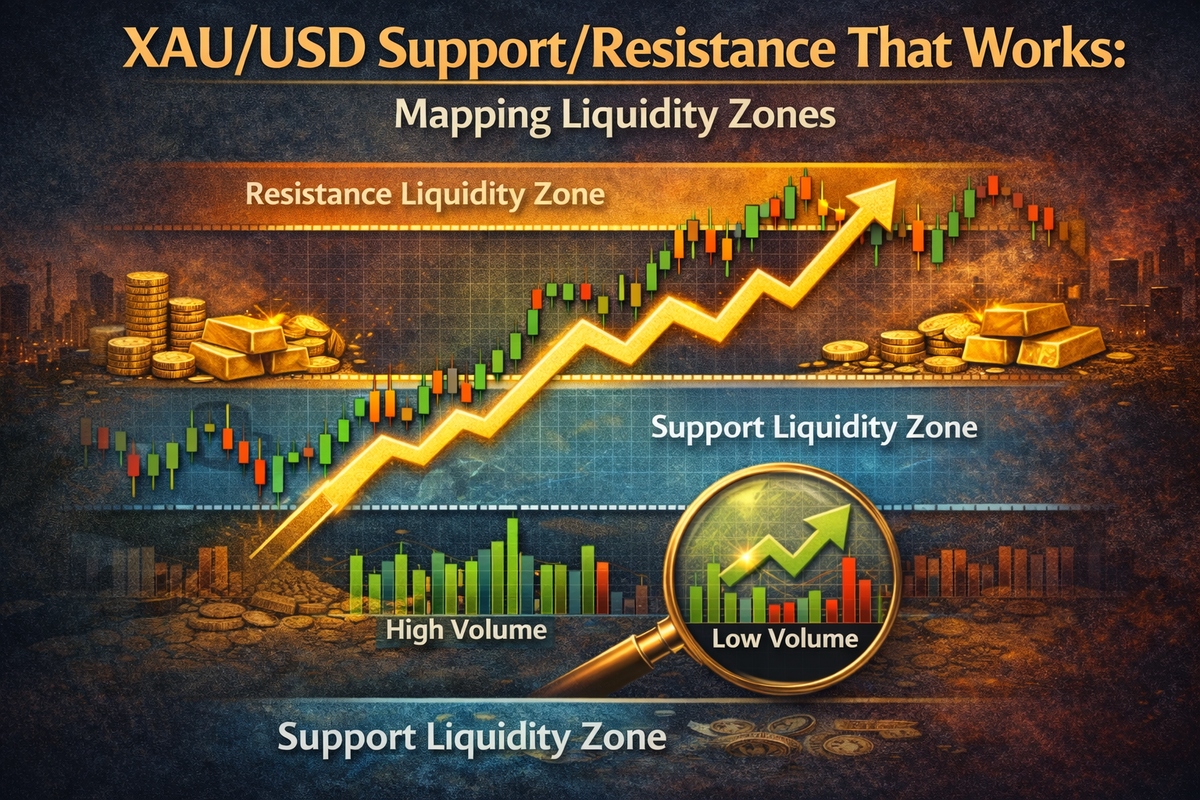
XAU/USD liquidity zones represent concentrated areas of institutional order flow where major market participants—banks, hedge funds, and prime brokers—cluster their buy and sell orders, creating predictable price reaction points that offer high-probability trading opportunities when properly identified and confirmed. Understanding these zones transforms traditional support and resistance trading from simple horizontal lines into a dynamic framework that reveals where the largest financial players position their capital in the gold market.
Understanding Market Liquidity in Gold Trading
Market liquidity in XAU/USD refers to the concentration of orders—both pending limit orders and stop-loss clusters—that accumulate at specific price levels rather than being evenly distributed across the chart. These orders create zones of heightened trading activity where price frequently reacts, reverses, or accelerates depending on whether buying or selling pressure dominates.
Gold's exceptional volatility makes it particularly susceptible to liquidity-driven price action, with liquidity typically accumulating near double tops, double bottoms, previous day highs and lows, and psychological round numbers. Unlike traditional support and resistance concepts that merely suggest where price "should" react, liquidity zones identify where institutional orders actually exist, providing a more precise framework for understanding price movement.
The concentration of liquidity at specific levels occurs because retail traders predictably place stop-loss orders just beyond obvious swing points, creating clusters that institutions can exploit to execute large positions efficiently. When price approaches these zones, the resulting interaction between institutional execution and retail stop-loss triggers generates the explosive moves that characterize gold's intraday behavior.
The Four Pillars of Liquidity Zone Identification
Psychological Levels and Round Numbers
Psychological levels—particularly round numbers ending in 00 or 50—act as natural magnets for market orders because traders psychologically anchor their decisions around these figures. On XAU/USD, levels such as $4,000, $4,050, and $4,100 demonstrate consistent accumulation of both pending orders and stop-loss clusters.
The significance of these levels extends beyond simple trader psychology—institutional algorithms also reference round numbers for order placement, creating a self-reinforcing concentration of liquidity. When multiple psychological levels converge with technical indicators at the same price zone, the resulting liquidity concentration becomes exponentially more significant.
Current market conditions show XAU/USD trading around $4,600 with critical psychological support at the $4,000 level, where repeated tests have revealed substantial buying interest. The $4,050-$4,030 zone serves as immediate support with active buyers defending this area according to weekly market reports.
Fibonacci Confluence Zones
Fibonacci retracement and extension levels provide mathematically derived price targets where institutional traders frequently position limit orders, creating natural liquidity clusters. The most significant Fibonacci levels for liquidity concentration include the 38.2%, 50%, 61.8% retracements and the 127.2%, 161.8% extensions.
When Fibonacci levels coincide with other technical elements—such as a rising trendline intersecting the 38.2% retracement at a $2,600 psychological level—the confluence creates a high-probability liquidity zone where supply and demand forces concentrate. These multi-factor confluence zones typically generate stronger and more reliable price reactions than isolated technical levels.
Traders should analyze Fibonacci levels across multiple timeframes, as daily chart retracements often align with 4-hour chart extensions, creating nested liquidity zones that institutional players target for position building. The intersection of these mathematical levels with historical price action creates what professional traders call "golden zones"—areas where geometric precision meets market momentum.
Historical Support and Resistance
Historical support and resistance levels that previously triggered significant price reactions remain relevant as liquidity zones because market participants retain memory of these levels and adjust their trading decisions accordingly. Strong support levels that absorbed selling pressure in the past tend to attract buying orders when price returns, creating demand zones below current market prices.
To identify significant historical levels, traders should analyze the daily timeframe and mark price points where strong reversals occurred after multiple tests. Rather than treating each individual test as a separate level, consolidate closely grouped historical levels into broader zones by setting the high at the highest point among these levels and the low at the highest candle close level.
The principle of polarity—where broken resistance becomes support and broken support becomes resistance—adds another dimension to historical level analysis. When gold decisively breaches a resistance level, psychological factors including grief and regret cause that level to transform into support as traders who missed the breakout wait for retracements to enter.
Trendline and Channel Boundaries
Dynamic trendlines and channel boundaries create moving liquidity zones as they represent diagonal areas where price consistently finds support or resistance during trending markets. These diagonal zones often intersect with horizontal support levels and Fibonacci retracements, forming multi-dimensional confluence areas that concentrate institutional order flow.
The lower boundary of an ascending channel typically functions as a demand zone where buying pressure accumulates, while the upper boundary serves as a supply zone where selling interest concentrates. When price approaches these boundaries, traders should anticipate potential liquidity sweeps—brief violations designed to trigger stops before reversing.
Current XAU/USD technical analysis reveals the pair trading within a developing ascending wedge pattern, with the lower boundary around $4,520 representing a key trendline support zone. This dynamic support area combines with the 50-day exponential moving average at $4,313 to create layered liquidity zones that institutional traders target during pullbacks.
Order Blocks: Institutional Footprints in Price Action
Defining Valid Order Blocks
An order block represents the last opposing candle before a strong impulsive move that causes a Break of Structure (BOS), marking the exact zone where large institutional players accumulated or distributed substantial order volume before a significant directional move. Unlike broad supply-demand zones that paint wide rectangles, order blocks are laser-focused—often a single candle wide—and represent actual executed volume rather than theoretical areas where orders "should" appear.
The validity of an order block depends on several factors: it must precede a decisive structural break, occur at a logical position within the broader market context, and ideally coincide with a Fair Value Gap (FVG) that confirms aggressive institutional execution. A bullish order block forms when a down candle precedes a strong upward impulse that breaks above a previous high, indicating institutional accumulation within that candle's range.
Conversely, a bearish order block emerges when an up candle precedes a strong downward impulse that breaks below a previous low, signaling institutional distribution. The key distinction is that order blocks specifically identify the candle where institutions placed their orders—not just where price reacted, but where the actual order execution occurred that fueled the subsequent move.
Why Institutions Form Order Blocks
Large financial institutions cannot execute billion-dollar positions in single transactions without dramatically impacting price, so they layer bids or offers across several candles within a concentrated zone. This bulk execution strategy allows prime brokers and hedge funds to accumulate substantial positions while minimizing market impact and achieving better average entry prices.
Institutions also engage in liquidity recycling by parking orders at prior order blocks, taking advantage of retail stop-loss clusters that provide the most efficient fills. When price returns to a previously established order block, remaining limit orders from the initial institutional accumulation can halt, absorb, or reverse the current move, creating high-probability reaction points that smart money traders exploit.
Order blocks often coincide with option strikes, fixing levels, or Treasury hedges that require predictable fill zones, adding fundamental rationale to these technical levels. This convergence of technical order placement and fundamental hedging requirements makes order blocks more reliable than arbitrary support-resistance lines drawn by retail traders.
Mapping Order Blocks on XAU/USD
To identify order blocks on gold charts, traders should start by analyzing higher timeframes—daily or 4-hour charts—to locate significant structural breaks where price decisively violated previous swing highs or lows. Once a Break of Structure is identified, look backward to find the last opposing candle before the impulsive move that caused the break.
Mark the open and close of this anchor candle and project the zone forward as a potential reaction area when price returns. The most powerful order blocks occur within larger liquidity zones—areas where psychological levels, Fibonacci retracements, and historical support-resistance converge. This multi-layer confluence increases the probability that institutional orders remain active within the zone.
When mapping bullish order blocks below current price, traders should identify the specific candle preceding a strong upward move that broke market structure, particularly if a Fair Value Gap formed during the impulse. For bearish order blocks above current price, locate the up candle immediately before a aggressive downward move that violated support, especially when accompanied by an imbalance in price delivery.
Fair Value Gaps: Price Inefficiency and Institutional Imbalance
Understanding Fair Value Gap Formation
Fair Value Gaps (FVGs) represent areas of price inefficiency or imbalance between buyers and sellers, created by large impulsive moves driven by institutional order flow that leave untraded price ranges on the chart. These gaps are identified through a three-candle pattern where the wick of the first candle does not overlap with the wick of the third candle, leaving an empty space or "gap" within the middle candle's range.
The formation of an FVG indicates that aggressive institutional buying or selling overwhelmed available liquidity at certain price levels, causing price to "skip" through those levels without adequate order matching. This inefficiency creates a vacuum that price often returns to fill, as the market seeks equilibrium by allowing orders to execute at previously untouched levels.
FVGs function as magnets or high-probability retracement zones where price is likely to revisit before continuing in the original direction. The strength of an FVG depends on the velocity of the move that created it—the more aggressive and voluminous the impulse, the more significant the resulting gap and the higher probability of a meaningful reaction when price returns.
Trading Fair Value Gaps on Gold
When trading FVGs on XAU/USD, identifying the gap alone is insufficient—traders must wait for price to retrace back into the zone and then look for confirmation signals on lower timeframes before entering. The most reliable confirmation comes from engulfing candles, momentum shifts, or Break of Structure patterns within the FVG zone that indicate institutional money is actively defending the level.
Gold's volatility makes FVG trading particularly effective because the rapid price movements characteristic of XAU/USD frequently create clean gaps that later attract price back for rebalancing. However, not all Fair Value Gaps carry equal weight—traders should prioritize FVGs that form during high-impact news releases, at the start of new trading sessions, or when breaking significant structural levels.
The concept of "golden ratio FVGs" involves analyzing whether the gap's size and positioning align with Fibonacci proportions relative to the broader move, transforming the setup from speculation into a probability-based trade where geometry meets market momentum. When an FVG intersects with a previously identified order block, the confluence creates an exceptionally high-probability zone that institutional algorithms target for position entry.
FVG Integration with Liquidity Zones
The most powerful trading setups occur when Fair Value Gaps nest within larger liquidity zones created by psychological levels, Fibonacci confluence, and historical support-resistance. This integration provides multiple technical reasons for price reaction—the FVG represents the micro-level inefficiency while the broader liquidity zone represents macro-level institutional positioning.
Current gold market analysis indicates premium zones where FVGs have formed above current price levels, creating bearish order blocks that smart money may use for distribution before deeper retracements. Conversely, FVGs within demand zones below market price offer potential long entry opportunities when price returns to fill the inefficiency and finds buying support at the liquidity cluster.
Traders should mark all significant FVGs on their charts but reserve actual trade execution for those that align with the higher timeframe directional bias and occur within or immediately adjacent to validated liquidity zones. This selective approach dramatically improves win rates by ensuring that micro-level price action confirms macro-level institutional positioning.
Liquidity Sweeps and Stop Hunts: Reading Institutional Behavior
The Mechanics of Stop Hunting
Stop hunts represent a natural market mechanism where price temporarily extends beyond obvious swing highs or lows to trigger clustered stop-loss orders, providing the liquidity that large institutions need to execute substantial positions efficiently. This is not malicious manipulation but rather how decentralized markets function when billion-dollar orders require significant volume for execution.
The classic gold liquidity hunt pattern unfolds in predictable phases: price first builds equal highs or equal lows that retail traders perceive as breakout zones; these obvious levels concentrate stop-loss orders just beyond the swing points; institutional players then push price through these levels to trigger the stops; and finally, after collecting liquidity, price reverses sharply in the opposite direction.
Traders who place stop losses immediately below support or above resistance without accounting for potential sweeps become the liquidity that institutions harvest. The characteristic wick that extends beyond a key level before a sharp reversal is the visual signature of a completed stop hunt—institutions have collected the necessary liquidity and are now ready to drive price in their intended direction.
Identifying Pre-Sweep Conditions
To anticipate potential liquidity sweeps on XAU/USD, traders should identify areas where retail traders are most likely to cluster their orders—double tops, double bottoms, and obvious trend line breaks where traditional technical analysis suggests placing stops. These formations create visible liquidity pools that appear on institutional order flow systems as zones requiring attention before major directional moves.
Market context provides additional clues about imminent sweeps—when price consolidates near a significant level for an extended period, building equal highs or lows, the probability increases that the next major move will first sweep through these levels before establishing true direction. Decreasing volatility and narrowing price ranges preceding a key level test often signal that institutions are preparing for a liquidity grab.
Volume analysis can confirm sweep conditions—genuine breakouts typically occur on expanding volume, while false breakouts designed to trigger stops often show reduced volume during the initial violation followed by explosive volume on the reversal. Traders should also monitor the behavior of price at the level itself—multiple touches that fail to cleanly break through suggest accumulation of orders within the zone, increasing sweep probability.
Trading Around Liquidity Sweeps
The most reliable trading strategy involves waiting for the liquidity sweep to complete before entering positions, rather than trying to anticipate the sweep or trading the initial break. After price extends beyond a key level and triggers stops, traders should look for rapid reversal confirmation—a strong engulfing candle back within the swept zone, or a Break of Structure in the opposite direction.
Entry timing becomes critical: enter after the sweep is confirmed but before the major directional move unfolds, typically on the first pullback following the reversal or on the break of a counter-trend structure. Stop placement should extend beyond the wick of the sweep itself, acknowledging that institutions may test the level once more before the sustained move begins.
On XAU/USD specifically, traders should anticipate aggressive liquidity sweeps due to gold's volatility, with price frequently pushing 10-20 pips beyond key levels before reversing. This characteristic behavior requires wider stop-loss placement than other currency pairs—stop losses positioned 100-200 pips beyond swing points are common among professional gold traders who understand the asset's tendency toward dramatic fakeouts.
Market Structure: BOS and CHoCH in Gold Trading
Break of Structure Explained
Break of Structure (BOS) occurs when price decisively breaks through the last swing high in an uptrend or the last swing low in a downtrend, confirming continuation of the prevailing trend and signaling that institutional money remains committed to the current direction. This structural break represents more than a simple higher high or lower low—it indicates a fundamental shift in the balance between supply and demand.
The three-phase BOS process begins with structure formation, where the market establishes clear patterns of highs and lows through the interaction of institutional players, retail sentiment, and fundamental factors creating temporary equilibrium. Phase two involves the actual break, where price decisively penetrates a significant high or low, often accompanied by increased volume, signaling that previous market rules no longer apply.
Following the break, phase three establishes new structure as the market begins forming fresh patterns based on changed sentiment, with the previous resistance often transforming into support in uptrends or previous support becoming resistance in downtrends. Traders should mark each BOS on their charts as these structural shifts define the current market regime and inform directional bias for subsequent trades.
Change of Character: Early Warning Signals
While BOS represents decisive structural breaks, Change of Character (CHoCH) refers to subtle shifts in market behavior that often precede major structural breaks, functioning as an early warning system—the tremor before the earthquake. Key CHoCH indicators include decreased momentum in the prevailing trend, inability to make new extremes despite multiple attempts, increased volatility around key levels, and divergence between price and volume.
The BOS-CHoCH sequence typically unfolds as follows: normal market behavior with predictable patterns gives way to emerging Change of Character as subtle signs appear through weaker bounces, shorter rallies, and increased consolidation time; the Break of Structure then occurs, confirming what CHoCH was suggesting; and finally new structure establishes itself based on changed sentiment.
Recent XAU/USD analysis revealed a powerful Change of Character on the 4-hour timeframe after gold moved within a declining structure printing lower highs and lower lows. The subsequent BOS indicated that bearish momentum was fading as smart money absorbed liquidity below $3,940—where retail sellers were trapped—before repositioning for a move toward premium supply zones above $4,030.
Implementing Structure Analysis in Gold Strategies
For practical implementation on XAU/USD, traders should combine BOS and CHoCH analysis with liquidity zone mapping to create high-probability trade setups. A bullish entry signal forms when CHoCH confirms a potential trend shift, followed by BOS breaking the previous swing low, with price then crossing back above the last swing low to confirm support.
Bearish entries require the opposite sequence: BOS must break the previous swing high, CHoCH confirms the trend shift, and price crosses back below the last swing high to confirm resistance. The most reliable setups occur when these structural shifts happen at or near previously identified liquidity zones—the intersection of structure change and liquidity concentration creates exceptional risk-reward opportunities.
Dynamic support and resistance levels derived from recent 10-bar highs and lows provide adaptive stop-loss and take-profit targets that adjust to changing market volatility. This structure-based approach to risk management ensures that protective stops respect current market conditions rather than using arbitrary pip distances that may be too tight during volatile periods or too wide during consolidation.
Practical Application: Building a Gold Liquidity Trading System
Multi-Timeframe Zone Mapping
Effective liquidity zone trading requires systematic multi-timeframe analysis, beginning with weekly and daily charts to identify major structural levels and broad liquidity clusters. These higher timeframe zones define the macro context—the regions where institutional positioning is heaviest and where the most significant price reactions will likely occur.
Once major zones are established, traders should move to 4-hour and 1-hour timeframes to refine the specific boundaries of each liquidity area and identify nested order blocks and Fair Value Gaps within the broader zones. This nested approach reveals how micro-level inefficiencies align with macro-level institutional positioning, creating high-confidence entry points.
The final step involves monitoring 15-minute and 5-minute charts for precise entry triggers—Break of Structure patterns, engulfing candles, or momentum shifts that confirm the liquidity zone is actively defended by institutional orders. Current market conditions show gold consolidating between $4,050-$4,110, with this band representing the key intraday battlefield where multi-timeframe analysis can identify tactical opportunities.
Confluence-Based Entry Criteria
To avoid overtrading and maintain high win rates, traders should establish strict confluence requirements before entering positions. A minimum three-factor confluence—such as a psychological level, Fibonacci retracement, and historical support combining at the same zone—ensures that multiple technical reasons support the trade thesis.
Enhanced setups incorporate additional factors: an order block within the confluence zone, a Fair Value Gap that needs filling, evidence of a recent liquidity sweep, and structural confirmation through BOS or CHoCH. The more confluence factors present, the higher the probability of a meaningful price reaction and the tighter the stop-loss can be placed.
Entry execution should follow a systematic process: first, wait for price to enter the identified liquidity zone; second, watch for lower timeframe confirmation signals; third, enter on the first momentum shift in the anticipated direction; and fourth, place stops beyond the extreme of the sweep or structural level rather than within the zone itself.
Risk Management Within Liquidity Zones
Gold's volatility demands specialized risk management approaches that account for frequent stop hunts and dramatic intraday swings. Professional gold traders commonly use stop-loss distances of 100-200 pips beyond swing points, recognizing that XAU/USD often pushes significantly beyond key levels before reversing.
Position sizing must be adjusted to accommodate these wider stops—rather than risking a fixed dollar amount per trade, traders should calculate position size based on the specific stop distance required for each setup. A $10-$20 stop on a 0.01 lot or a $150+ stop on a 0.10 lot represents standard risk parameters for gold trading, where stops are designed to protect edge rather than expecting to be hit.
Mental preparation is equally important—traders must accept that gold positions may move significantly against them before resolving in their favor. Price can swing 100 pips in the wrong direction and still produce a wick reversal that leads to profit, but only if the trader sized appropriately and placed stops beyond likely sweep zones.
Directional Bias and Context Filtering
Before executing any trade based on liquidity zones, traders must establish clear directional bias aligned with higher timeframe trends and fundamental sentiment. When the daily chart shows a strong uptrend with price above major moving averages and momentum indicators pointing higher, focus exclusively on bullish setups at demand zones below current price.
Context filtering also involves awareness of scheduled news events and economic releases that can override technical levels—the Consumer Price Index, Non-Farm Payrolls, and Federal Reserve announcements often create volatility that invalidates even the strongest liquidity zones. During these high-impact events, institutions may aggressively sweep multiple levels in rapid succession, making precise technical trading temporarily unfeasible.
Current technical outlook for XAU/USD shows mixed signals with the pair trading within an ascending wedge that indicates fading upside momentum and potential bearish reversal risk if prices break below the lower trendline on strong volume. This context suggests that traders should remain flexible, prepared for both bullish reactions at the $4,050-$4,030 support zone and bearish momentum if the wedge breaks and opens doors toward the $4,313 level.
Advanced Concepts: Premium and Discount Zones
Market Positioning Relative to Value
Smart Money Concepts divide the price structure into premium and discount zones relative to a central equilibrium or fair value level, typically defined by the midpoint of the most recent significant range or swing. Premium zones exist above this fair value midpoint and represent areas where price is theoretically overvalued, making them optimal for seeking short positions or taking profits on longs.
Discount zones fall below the fair value midpoint and represent areas where price is theoretically undervalued, creating favorable conditions for seeking long positions or taking profits on shorts. This framework helps traders align their bias with market positioning—buying in discount zones and selling in premium zones improves the probability of trading with rather than against institutional flow.
Current gold market analysis indicates that XAU/USD is positioned in a premium zone, with price extended above fair value and waiting for catalysts like Consumer Price Index data to provide the next liquidity-driven move. In such conditions, aggressive long positions carry increased risk while patient traders may look for opportunities to fade strength into premium supply zones.
Accumulation Versus Distribution Zones
Accumulation zones represent price areas where institutional buyers build substantial long positions, typically occurring in discount regions after liquidity sweeps have trapped retail sellers. These zones are characterized by declining structures that suddenly reverse with powerful Change of Character, indicating that smart money has finished accumulating and is ready to drive price higher.
Distribution zones occur in premium areas where institutional sellers unload positions to retail buyers chasing breakouts, often marked by equal highs that eventually fail after a final liquidity sweep. The key structure level that previously held as support during accumulation often acts as the base—in gold's recent action, the $3,981-$3,948 zone served as an accumulation base where institutional buy orders were likely placed.
Identifying whether gold is in accumulation or distribution mode requires analyzing the broader context: Is price making lower highs in a premium zone with bearish order blocks overhead? Distribution is likely. Is price holding above a key demand zone in a discount region with bullish order blocks supporting? Accumulation is probable.
Supply and Demand Imbalance Zones
Beyond simple support and resistance, effective liquidity mapping identifies specific supply and demand imbalances—areas where one side of the market dramatically overwhelmed the other, creating structural inefficiencies. Demand zones like the recent $3,981-$3,948 bullish order block and $3,937 deep liquidity pocket on gold represent areas where buying interest should theoretically dominate if price returns.
Supply zones such as the $4,030-$4,047 bearish order block and $4,047-$4,051 final buy-side liquidity zone mark areas where selling pressure should emerge as institutional profit-taking or fresh short positions activate. These aren't arbitrary levels but specific zones where the market previously demonstrated clear supply-demand imbalance through aggressive one-directional moves.
When price approaches an imbalance zone, traders should watch for confirmation that the imbalance remains valid—a strong rejection on first touch suggests active orders remain within the zone, while a slow grind through indicates the imbalance has been absorbed and the zone is no longer relevant. Gold's tendency to respect these zones makes XAU/USD particularly well-suited to imbalance-based trading strategies.
Common Mistakes and How to Avoid Them
Touch Trading and Premature Entries
The most common error in liquidity zone trading is "touch trading"—entering a position immediately when price reaches a identified zone without waiting for confirmation that institutional orders are actively defending the level. This approach assumes that a zone marked on the chart will automatically produce a reversal, ignoring the reality that zones become invalid when the conditions that created them change.
The solution requires discipline: treat zones as liquidity magnets that price is drawn to first, then wait for evidence that price is reversing after collecting stops and showing confirmation through lower timeframe structure breaks or momentum shifts. On gold specifically, where volatility enables deep wicks through zones before reversals, confirmation signals become even more critical.
Traders should also avoid the temptation to enter positions ahead of the zone, hoping to catch the exact bottom or top—this strategy results in repeated stop-outs as liquidity sweeps extend beyond anticipated levels. Better results come from allowing the sweep to complete fully, accepting a slightly worse entry price in exchange for dramatically improved win rates.
Ignoring Market Structure Context
Another significant mistake involves trading liquidity zones in isolation without considering the broader market structure and trend context. A perfectly formed demand zone in a strong downtrend may produce only minor bounces before price continues lower, while the same zone in an uptrend could generate substantial reversals.
Effective trading requires integrating liquidity zones with structure analysis—only take long positions at demand zones when the higher timeframe trend is bullish and recent BOS patterns confirm upward momentum. Similarly, short positions at supply zones work best when the macro structure shows bearish characteristics with CHoCH warnings preceding downward BOS breaks.
Context also includes awareness of where price sits relative to premium and discount zones—forcing long entries in premium areas or short entries in discount regions fights against the institutional positioning that defines market flow. Traders should patiently wait for price to reach appropriate zones that align with both technical structure and value positioning.
Overcomplicating Zone Identification
While confluence enhances zone reliability, some traders fall into the trap of requiring so many confirming factors that they rarely find valid setups. The optimal approach balances thoroughness with practicality—three to four confluence factors provide robust confirmation without being overly restrictive.
Additionally, traders sometimes spend excessive time drawing zones at every minor swing point, cluttering their charts with dozens of levels that create analysis paralysis. A cleaner approach involves focusing only on significant zones from the daily and 4-hour timeframes—areas where major structural events occurred and where institutions are most likely to have positioned substantial orders.
The goal is developing efficient zone mapping that highlights the 3-5 most significant areas on each side of current price rather than marking every historical level. These key zones will typically combine multiple confluence factors naturally—the most important levels tend to feature psychological numbers, Fibonacci alignment, and historical significance simultaneously.
XAU/USD liquidity zone trading transforms gold trading from reactive support-resistance bounces into proactive positioning based on institutional order flow and market structure dynamics. By systematically mapping confluence zones, identifying order blocks and Fair Value Gaps, anticipating liquidity sweeps, and confirming entries with structure breaks, traders align themselves with the smart money forces that drive gold's dramatic price movements. The framework requires patience—waiting for optimal confluence, confirmation, and context—but rewards disciplined execution with high-probability setups that offer exceptional risk-reward ratios in one of the market's most volatile and liquid instruments.


Comments ()